![Netstream_White_RGB[1].svg]](https://support.netstream.cloud/hubfs/Netstream_White_RGB%5B1%5D.svg)
Installing NSX Edge (Autonomous Edge)
Summary
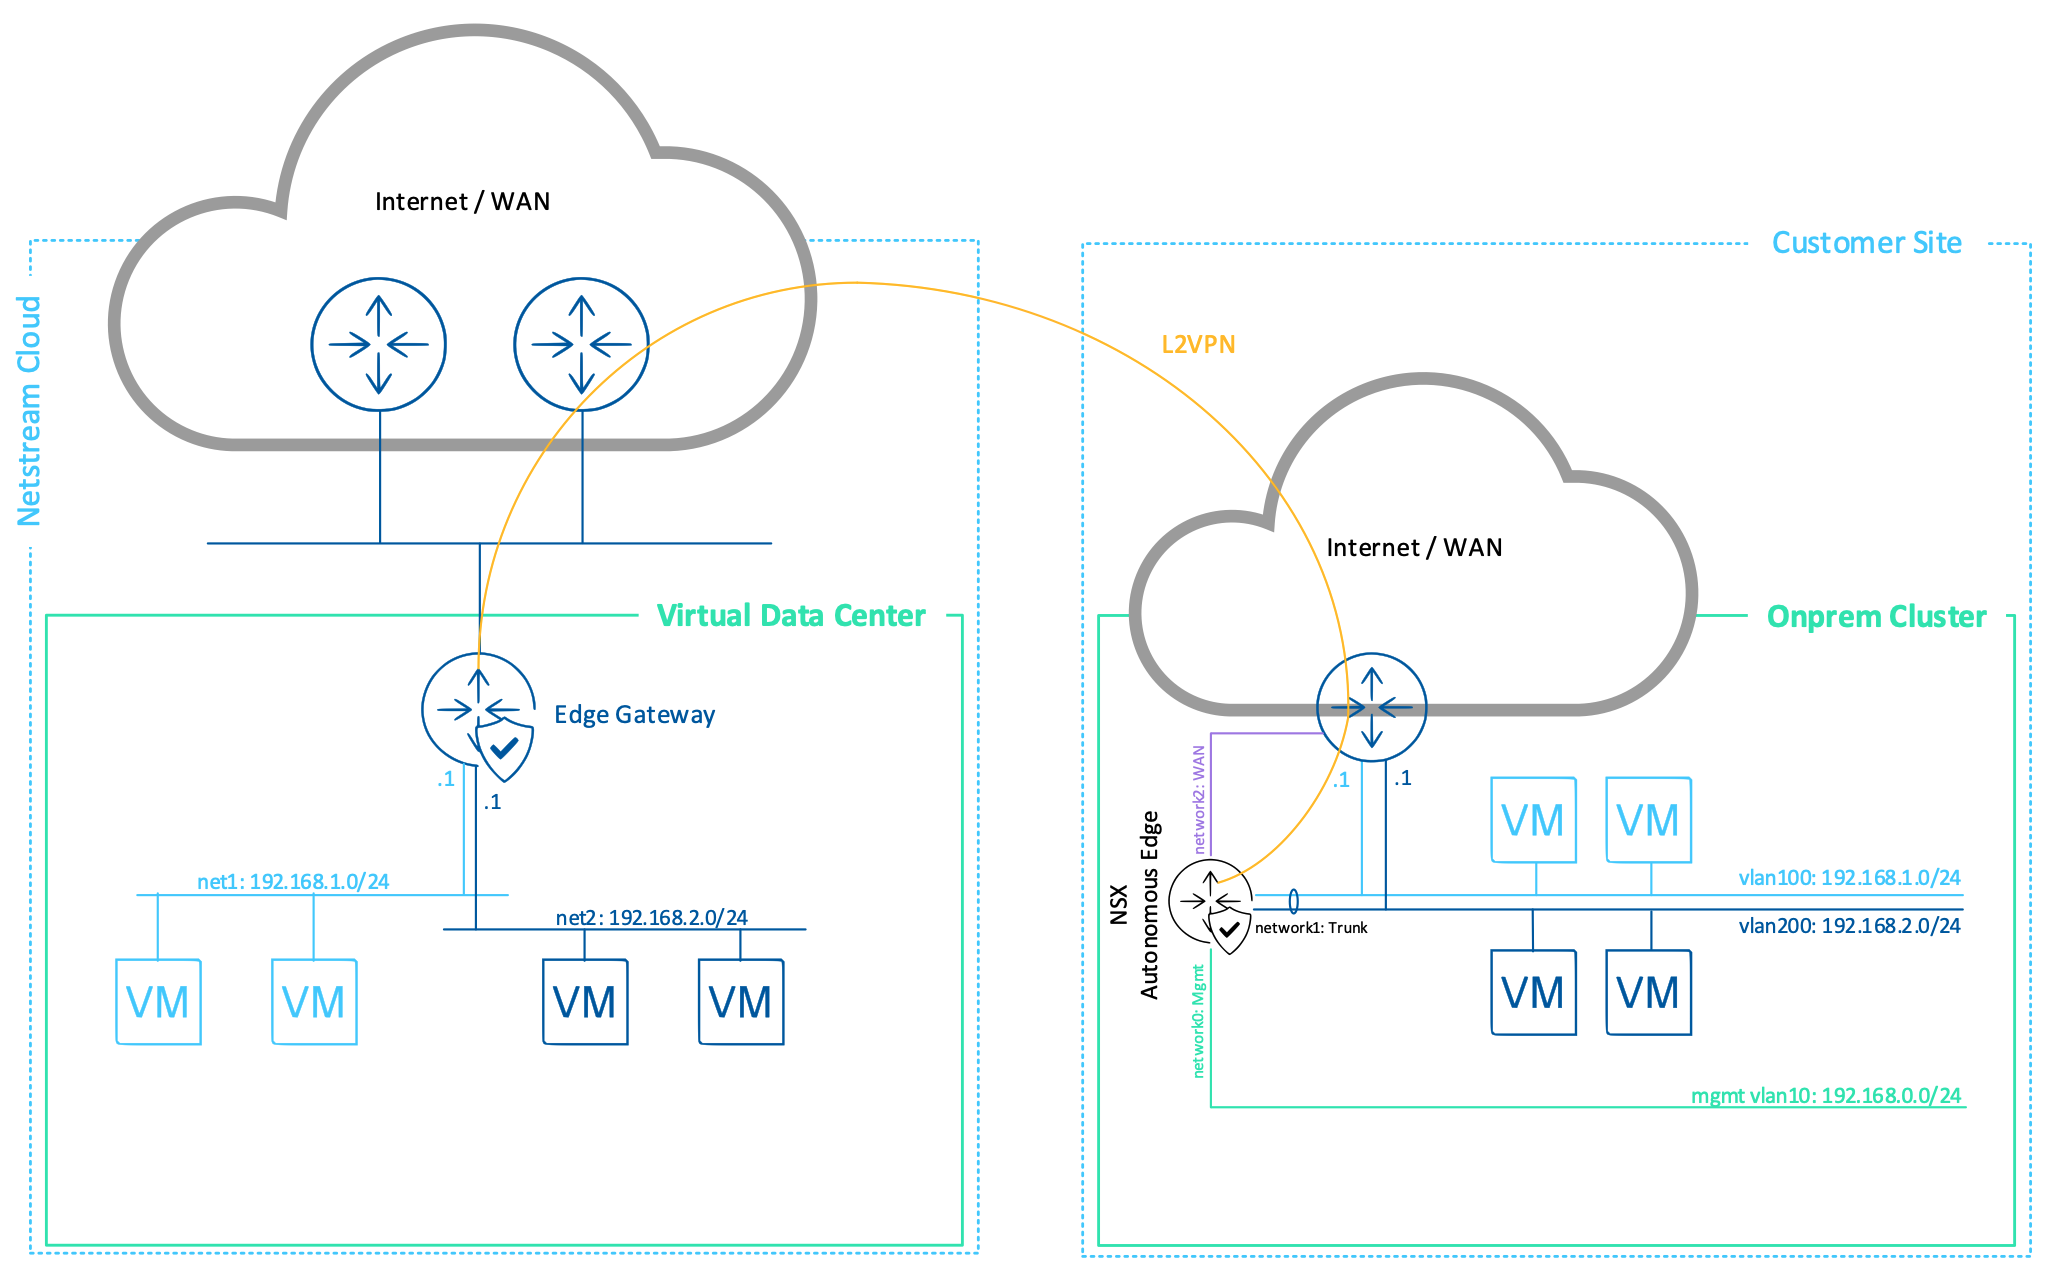
To connect a local network (Layer 2) to the cloud network, you can also set up a Layer 2 VPN (L2VPN), also called L2 stretch. To do this, an NSX Autonomous Edge is deployed in the local VMware environment (if the local installation is not run with NSX).
The following diagram shows the setup. Once the L2VPN is set up, you can migrate VMs from your site to the cloud (or vice versa) without changing the network. The migration is carried out using Cloud Director Availability.
Requirements
- NSX is not installed in the local environment
- The NSX Autonomous Edge appliance must be reachable via a public IP address (firewall / NAT rules or a direct public IP address)
- A trunk port group is configured with the relevant VLANs/VXLANs
- You have created a new network in the VDC that is identical to the local one
- The VDC network must be connected to your Edge Gateway as a sub-interface. The "internal" type is currently not supported
Procedure
- Create the local network in the VDC (e.g. net1 & net2 in the diagram). "Type sub-interface".
- Create a trunk port group in your environment and allow the required VLANs/VXLANs on it
- Deploy the NSX Autonomous Edge in your VMware environment
- Configure the network ports of the NSX Autonomous Edge
- Integrate the NSX Autonomous Edge
- Create the remote L2VPN connection
- Create the local L2VPN connection
Deploying the NSX Edge appliance using OVA
Log in to your on-premises VMware environment as an administrator.
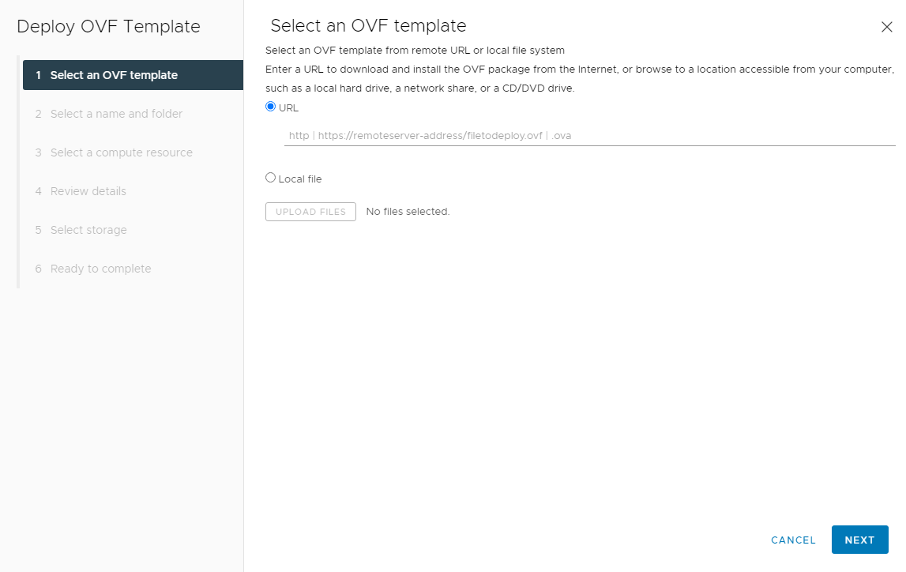
Select "Deploy OVF Template" in the menu, e.g. by right-clicking your data centre.
Enter one of the following as the URL:
v4.2.1.3.0:
v3.2.0.1:
v3.1.3.5:
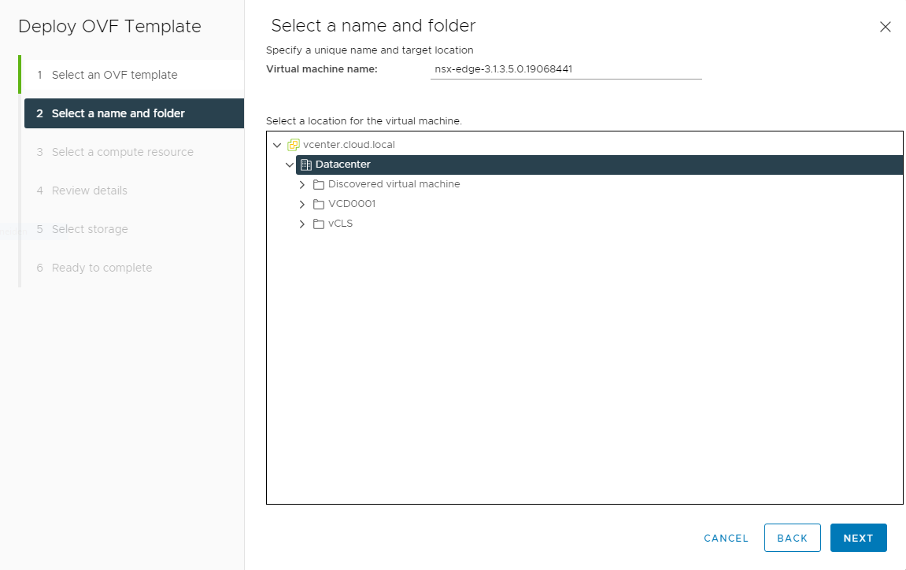
Next, select the resources on which the appliance is to be placed in your environment:
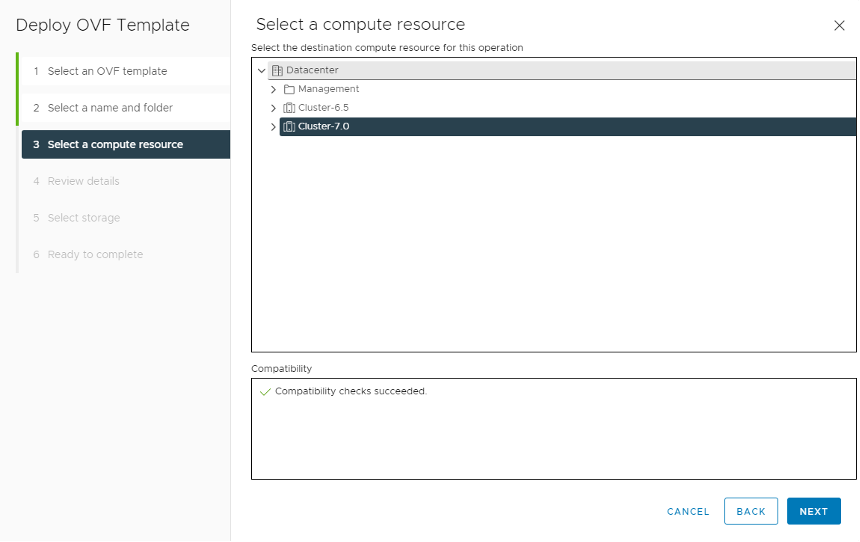
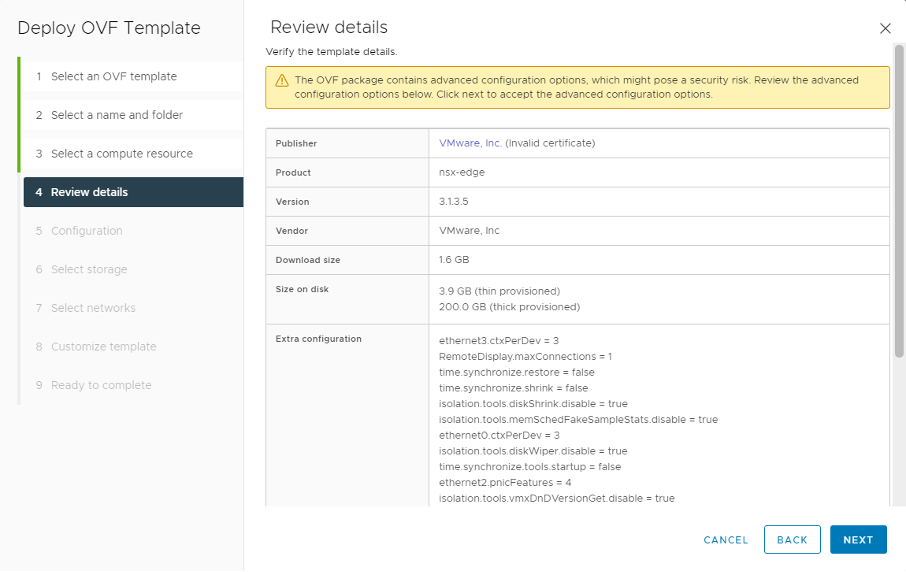
Check once more that the selected settings are correct:
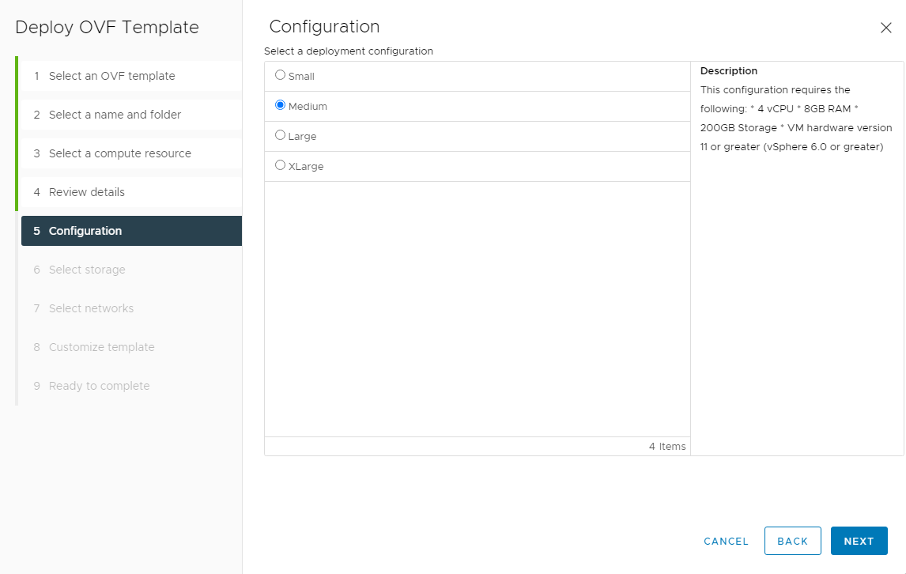
Select the size of the appliance:
Note
Medium is sufficient for migration scenarios in most cases.
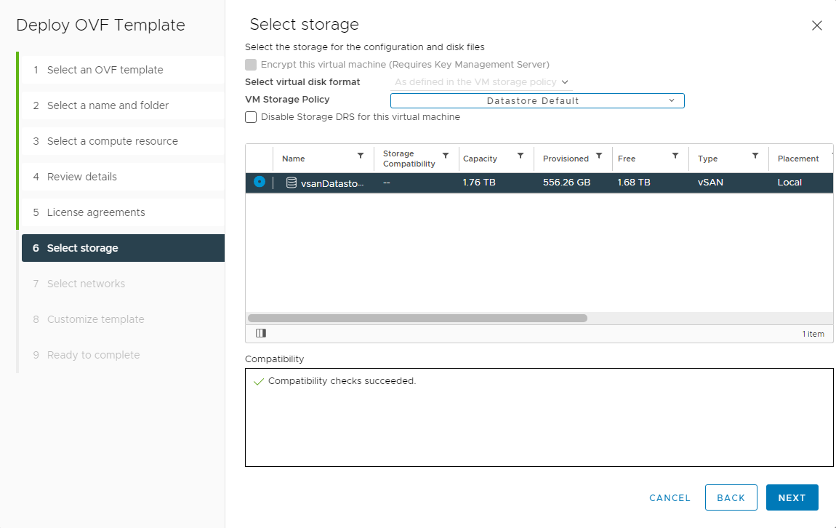
Select the storage location where your appliance will be deployed:
Select the networks (port groups) to which the appliance will be connected.
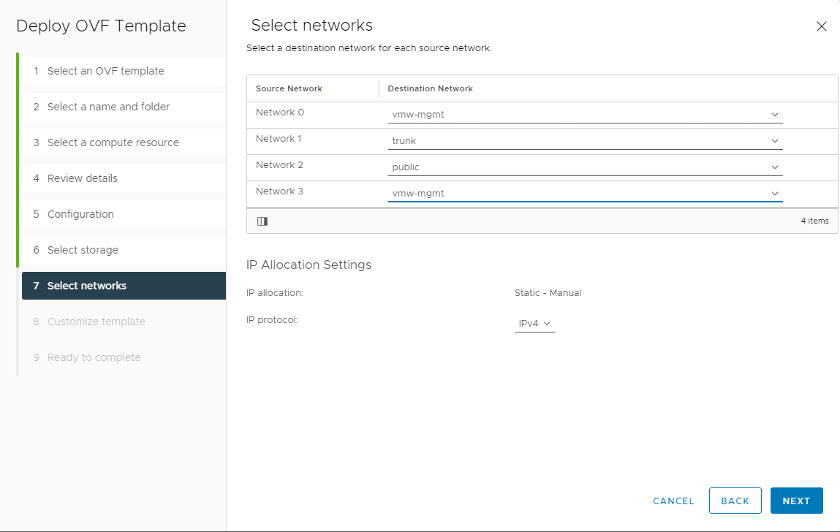
Network 0: management interface through which the appliance is managed
Network 1: trunk port group through which the L2 stretch VLANs/VXLANs are transported
Network 2: public. Connection to the public network. Public IP or firewall/NAT forwarding
Network 3: not used.
Note
If you do not yet have all the port groups, you can also assign them later. In this case, select the management port group for all of them. Exception: if you have a vSwitch and not a vDVSwitch, you must already have created and selected the port group.
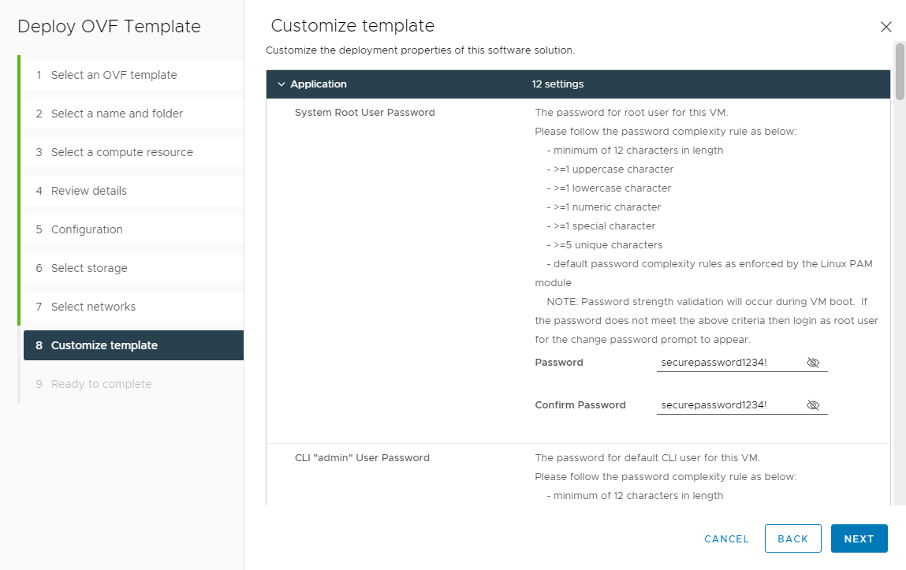
So that the appliance can be managed later, set a secure password for each of the users (root/admin/audit):
The Autonomous Edge role must be enabled:
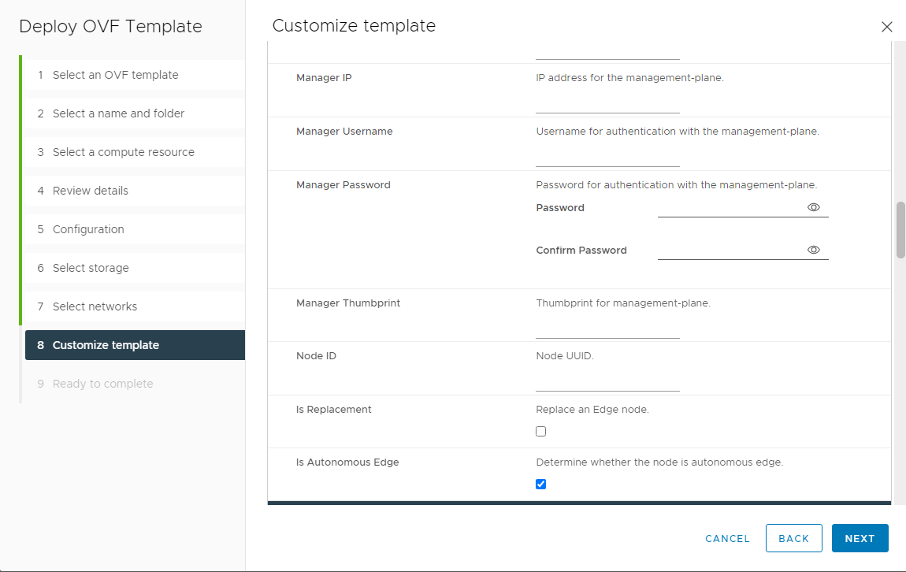
You can leave all other fields, such as Manager IP and Node ID, empty. They are not relevant in this setup.
Now complete the network configuration:
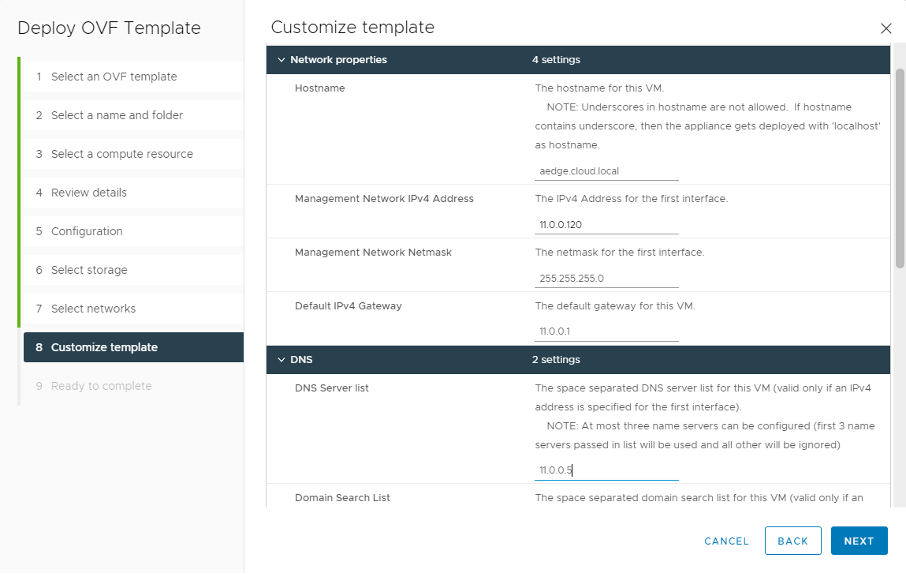
Set the IP address, netmask & default gateway you want here. These must match your chosen network.
You can also configure the uplink port at the same time. You can then skip the later "Configure the uplink port" steps.
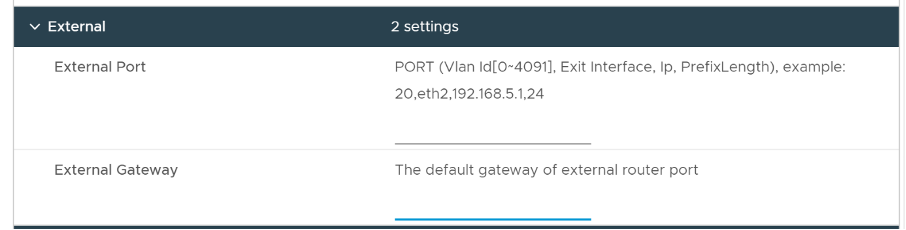
Example:
External Port: 0,eth0,13.0.0.101,24
External Gateway: 13.0.0.1
Optional:
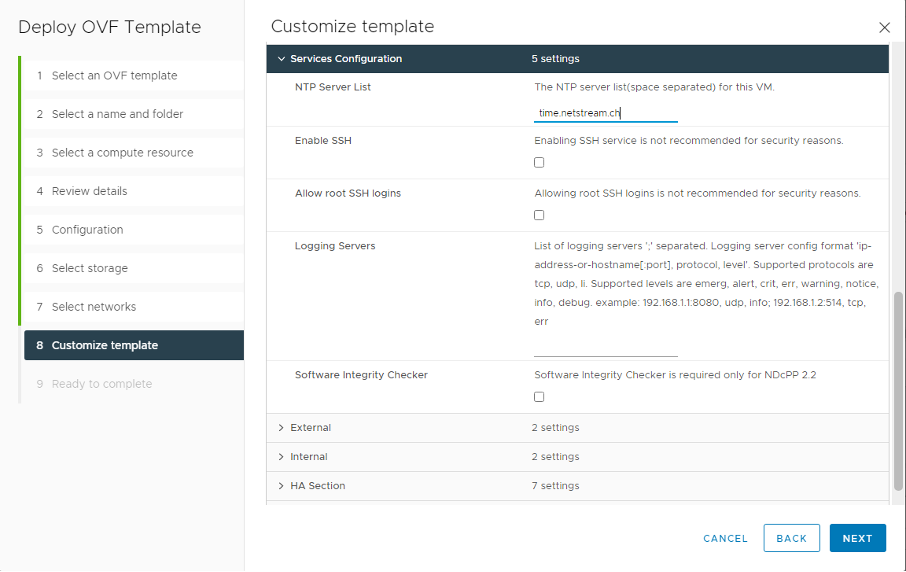
If you wish, you can enable SSH. This is only needed for troubleshooting.
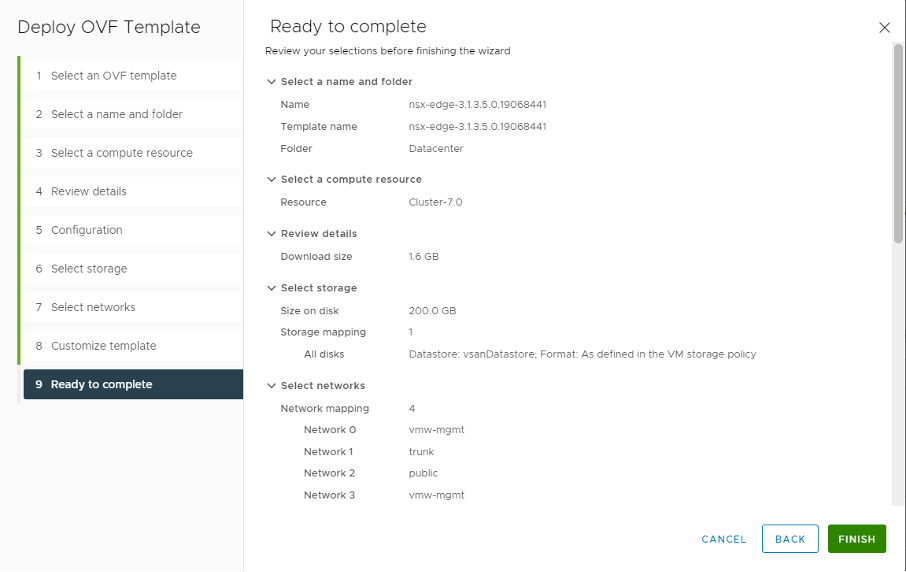
Check the details and complete the installation:
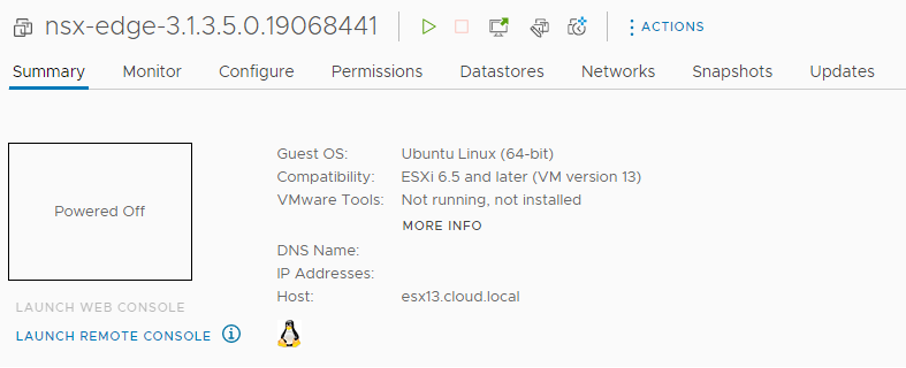
Once the appliance has been deployed successfully, start the VM:
If the appliance has been configured correctly, the following is displayed:

If your password did not meet the requirements, the following is displayed:

Password (root): vmware
Password (admin): default
Configuring the NSX Edge appliance
As the NSX Edge appliance is then added in the Cloud Director Availability Suite, no further steps are needed.
It is important that the NSX Edge has finished initialising. If you log in as "root" and see the following message, this is not yet the case. Only go to the next step once this message no longer appears and the NSX Edge is initialised.
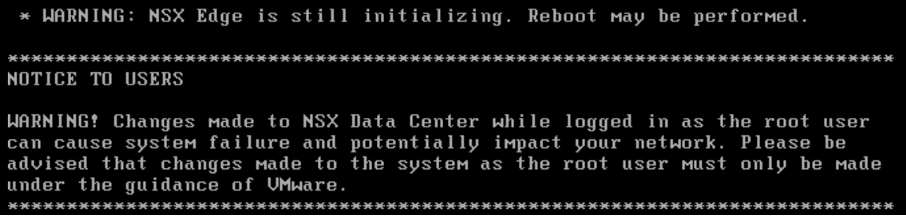
The process takes about 5 minutes.
Integrating the NSX Edge appliance in the Cloud Director Availability Suite
In your vCenter, select "Cloud Provider DR and Migration" in the menu. Here you will find all the functions and options of the Cloud Director Availability Suite.
Under the "L2 Stretch" menu item, you can add the NSX Autonomous Edge:
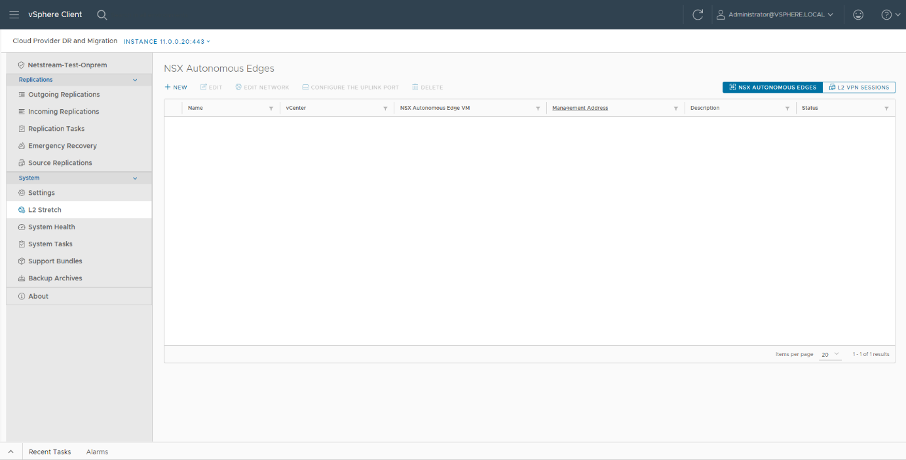
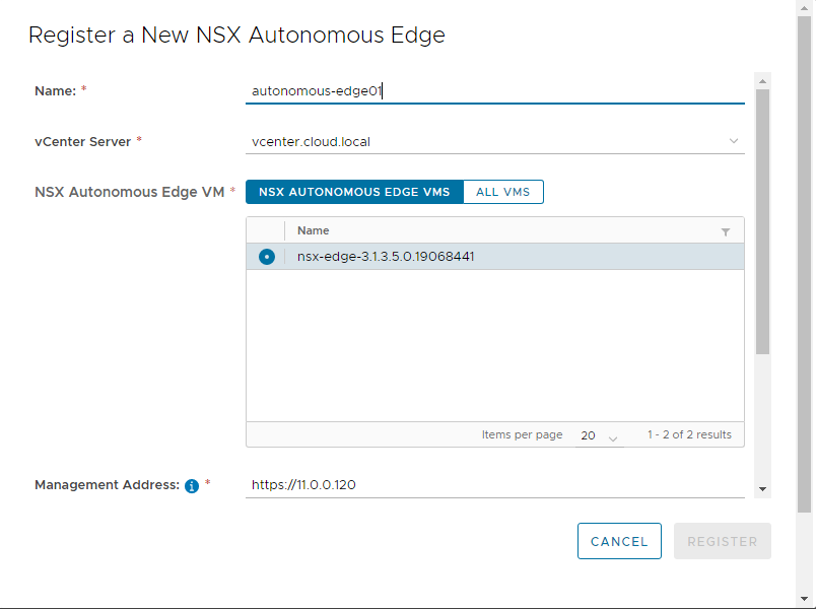
The next window automatically shows the VM that you previously deployed from the OVA. Choose a name and enter the "admin" password.
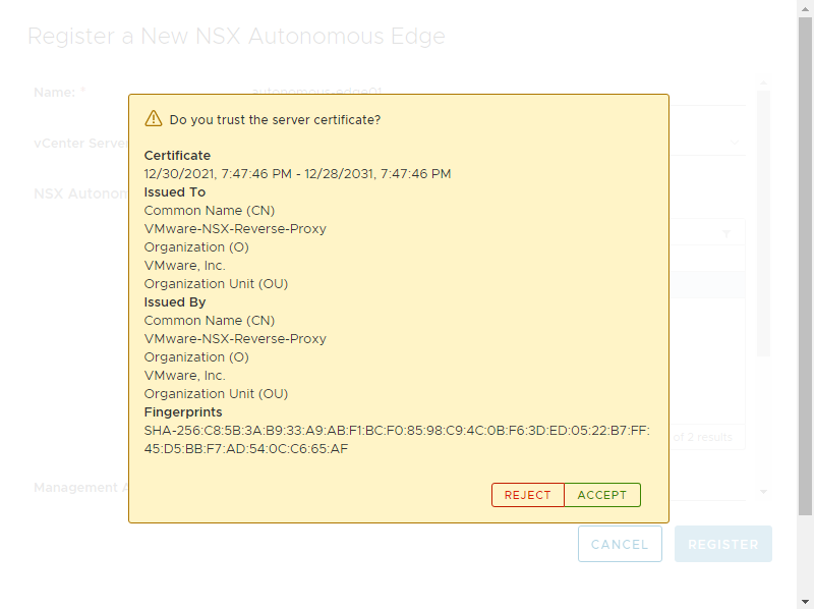
Validate and accept the certificate of your NSX Autonomous Edge:
After you add your NSX Autonomous Edge, it is shown that the uplink port is not yet configured:

First select the menu item to check the network adapters. If you already configured all the port groups during installation, you can confirm the dialogue. Otherwise, configure the relevant port groups now:
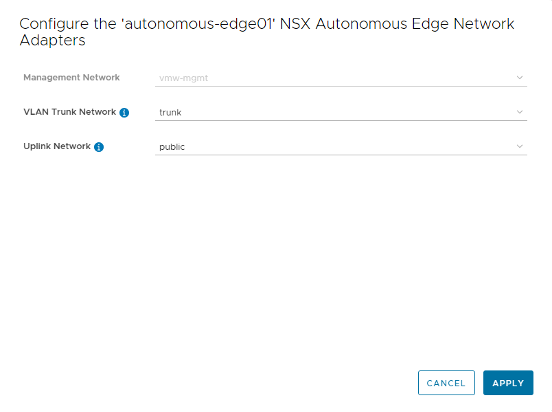
Next, configure the uplink port, which allows the connection to and from the internet. If you can assign a public IP directly to the VM, this simplifies the configuration. However, you can also install the NSX Autonomous Edge behind a firewall/NAT. To do this, you must set up the relevant ports & NAT rules:
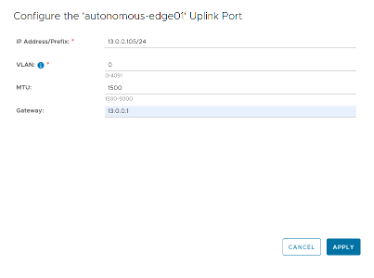
In this example, we use an "internal" network and then set up the firewall/NAT accordingly. If you can assign an external IP address directly to the VM, do so. If a VLAN is needed to communicate with your router on the connected port group, also specify the VLAN here.
Once the configuration is complete, the status of your Autonomous Edge changes to "OK":

Remote L2VPN connection
So that you can later use the L2VPN server session in the local configuration, you must first configure it in your cloud.
To do this, log in with your administrator credentials at https://console.vcloud.netstream.cloud/.
You can reach the Availability (Netstream_Cloud) option under the "More" menu item.

Go to the L2 Stretch option to set up a new connection. Make sure you select the correct Edge Gateway and VDC if you have more than one in your organisation.

When you create the connection, you must enter the local and the remote address:
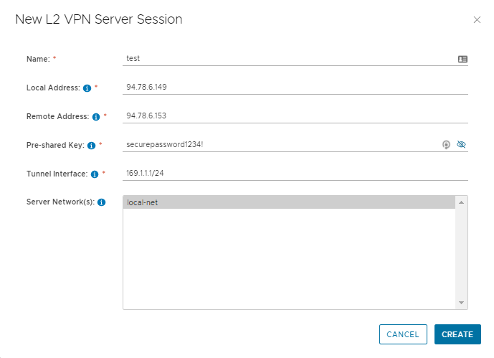
Local Address: this is the IP address of your Edge Gateway. The info button shows you the possible IP addresses.
Remote Address: enter the public IP address of your NSX Autonomous Edge. Always use the public IP address here, which you forward accordingly in the case of firewall/NAT.
Pre-Shared Key: choose a secure pre-shared key
Tunnel interface: the default values can usually be used.
Server Network(s): select the networks you created previously. Important: only networks of the "Sub-Interface" type are shown.
Local L2VPN connection
In your vCenter, select "Cloud Provider DR and Migration" in the menu. Here you will find all the functions and options of the Cloud Director Availability Suite.
Under the "L2 Stretch" menu item, you will find the L2 VPN Session item.
As the next step, an L2 client session is created. Note that you must already have completed the L2 server session in the "Remote L2VPN connection" step:
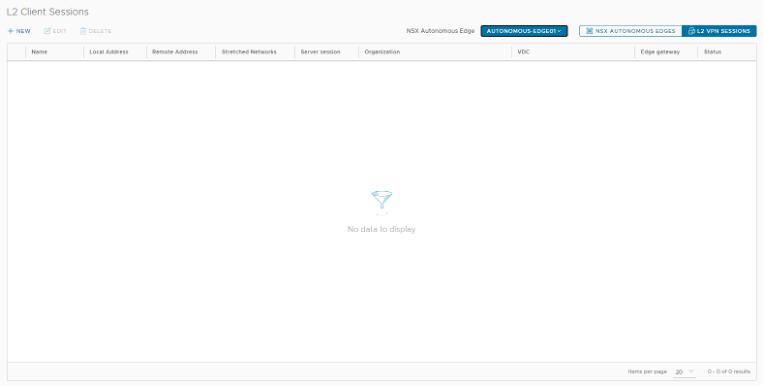
When you have started the wizard for the new client L2 VPN session, you are asked for your Netstream Cloud credentials.
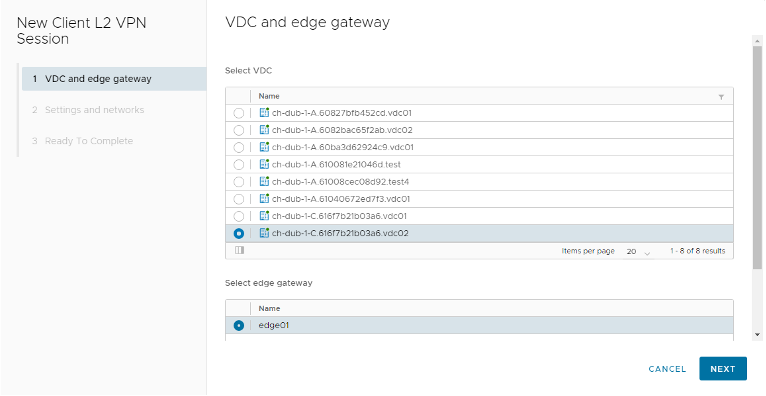
The user name is in the following format: <User>@<OrganizationID>.
You can find this information in the console at https://console.vcloud.netstream.cloud/.
Now configure the network settings of your new connection:
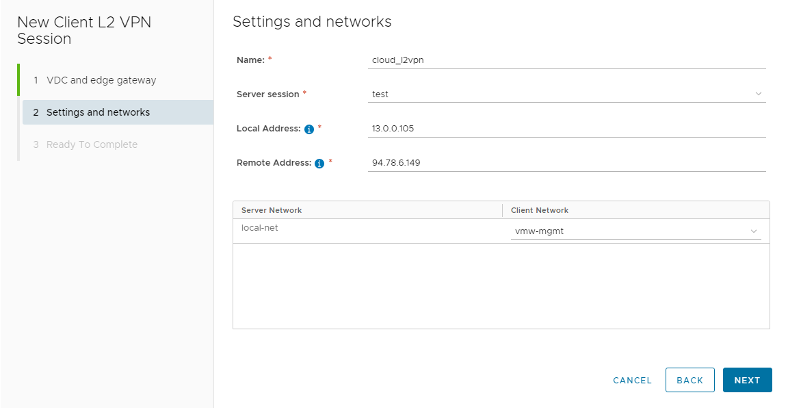
Name: you can choose this freely
Server session: this shows the session you set up previously. If it does not, you must first set it up as explained in the section "Remote L2VPN connection".
Local Address: this is the IP address you previously assigned to your NSX Autonomous Edge in the "Uplink" step. Whether you use a public or an internal IP address, it must always match the uplink setting.
Remote Address: use the IP address of your Edge Gateway from the Netstream Virtual Data Center (VDC) here
Server Network: select the mapping of the local networks to the cloud networks.
In the example in the diagram, this would be as follows:
| Server Network (Cloud) | Client Network (Local) |
| net0 | VLAN100 |
| net1 | VLAN200 |
Check your selected settings once more and confirm them:
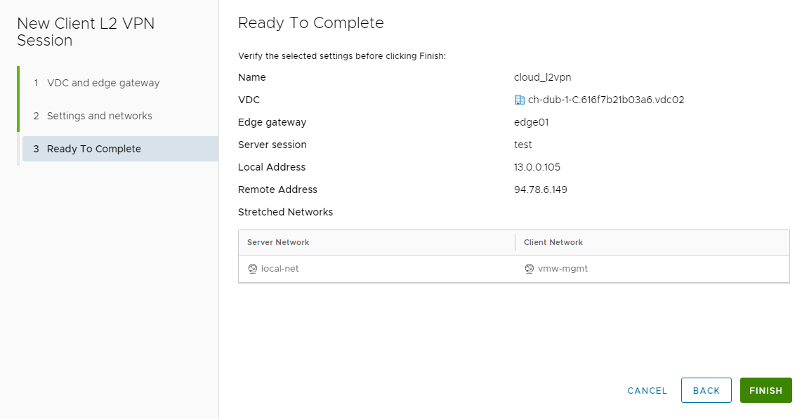
If all configurations are correct, the status is shown as "Up":

Congratulations, the L2 connection is set up correctly. You can now reach VMs in the cloud network and in the local network directly.