![Netstream_White_RGB[1].svg]](https://support.netstream.cloud/hubfs/Netstream_White_RGB%5B1%5D.svg)
We recommend that you first read the article Quickstart: Virtual Data Center (VDC) to understand how the VDC works.
First, log in to vCloud Director. You can find all backup functions in the More menu, then Data Management v2.
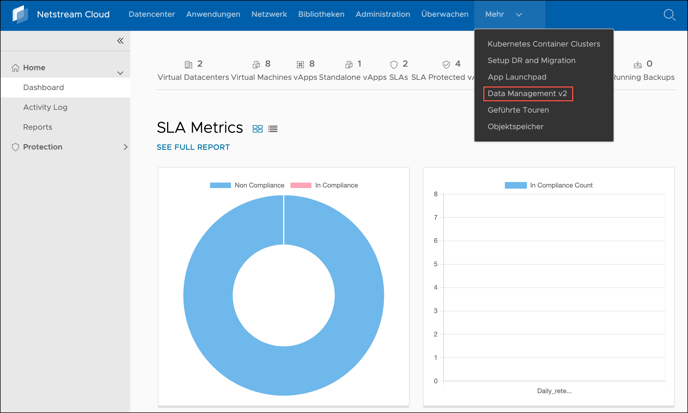
This initial view shows all the relevant statistics.
Creating backups
One of the most important functions is creating backups. To do this, go to the Protection menu, then vApps:
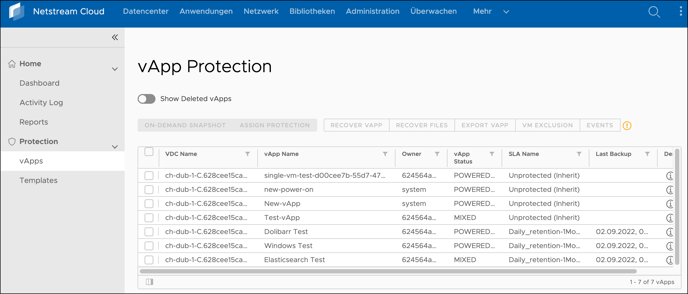 Here you can see which vApps exist in the VDC and whether they are already being backed up.
ℹ️ TERMINOLOGY
The vCloud Director backup, which is based on the "Rubrik" software, uses the following terminology to indicate whether a vApp is being backed up or not:
- SLA: if an SLA is assigned to the vApp, the vApp is backed up. The SLA defines how long backups are retained, when they are archived, and so on. You can adjust the SLAs in the Rubrik GUI.
- Protected: this term means that a vApp is being backed up
- Unprotected: this term means that no backup and no SLA are configured
- Snapshot: this term is often used to refer to a backup
There are 2 ways to back up a vApp:
On-Demand Snapshot
With the On-Demand Snapshot function, you can back up a vApp once (for example, before you make major changes). To do this, select the vApp and then click On-Demand Snapshot:
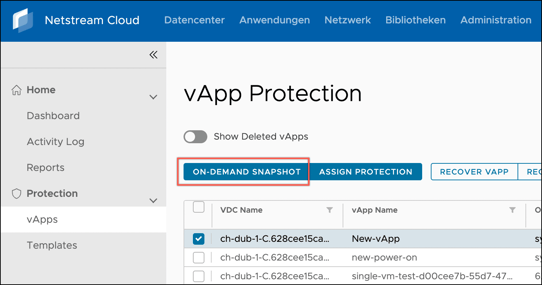
You can then specify which SLA to use for backing up the vApp:
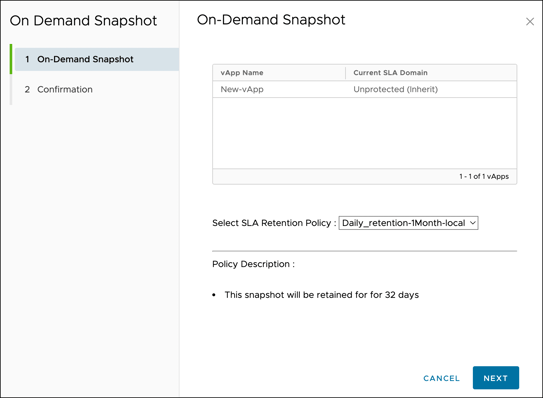
After you confirm, a backup starts immediately.
Automated backup
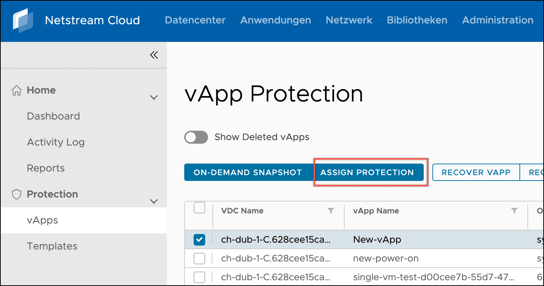
With this function, a vApp is backed up automatically at regular intervals. This is particularly recommended for vApps where it is important that an up-to-date backup is always available. To do this, select the vApp and then click Assign protection:
You can then specify which SLA to use for backing up the vApp:
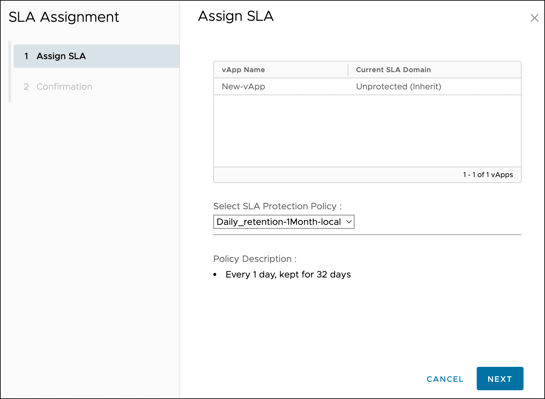
After you confirm, the backup is configured and then runs regularly according to the SLA. In this example, the backup runs daily and is retained for 32 days.
Configuring the SLA
You can configure the SLAs used by the backup in the Rubrik user interface.
An SLA mainly defines the following criteria:
- how often a backup is created
- how long backups are retained
- whether and when backups are archived or offloaded to Object Storage
ℹ️ NOTE
You can find the Rubrik user interface (GUI) here: https://console.backup.netstream.cloud
Use the same login details there as for vCloud Director.
To configure the SLAs, click the SLA Domains menu, then Local Domains.
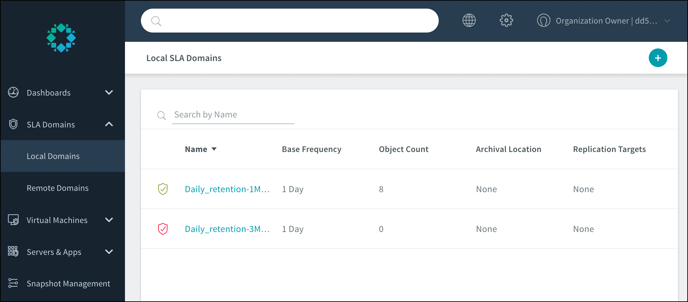
You can edit existing SLAs by clicking on them. When you obtain a new VDC from Netstream, 2 SLAs are already predefined. These cannot be modified.
You can create new SLAs by clicking "+" at the top right.
The following menus contain a large number of options. These are described in detail in the Rubrik documentation. Our support team will be happy to help you create your own SLAs and integrate Object Storage.
Restoring a backup
You can restore any vApp that has been backed up. There are several options for this as well:
Recover vApp
With this function, you can restore a vApp so that the backup is applied over the running vApp and replaces it. You use this, for example, when a vApp no longer works, e.g. because of a software problem or a major data loss.
In vCloud Director, go to the Protection -> vApps menu, click the vApp, then click Recover vApp. Here you select which VMs within the vApp you want to restore:
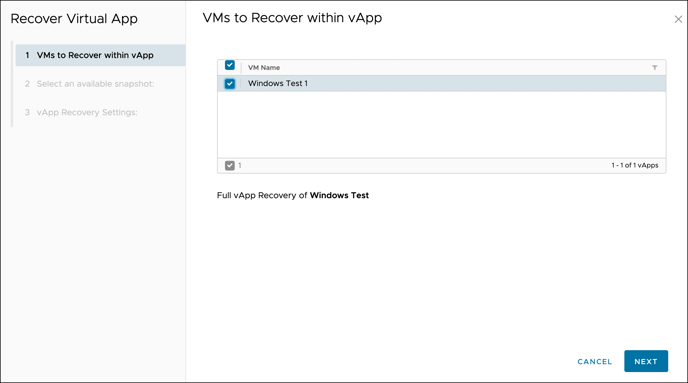
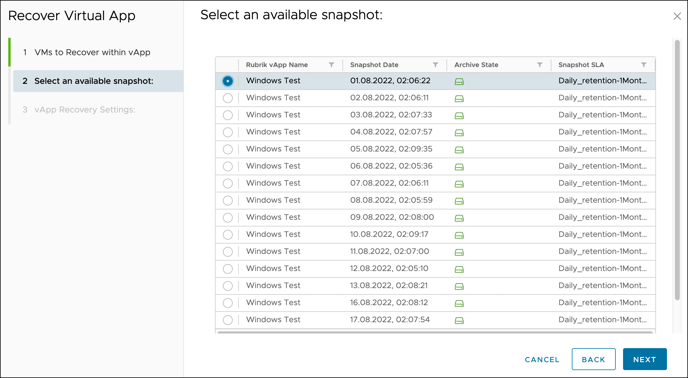
Next, select the snapshot point in time you want to restore:
Finally, specify what should happen to the network connections. The following options are available:
- Unmap interfaces: the network connections are not assigned to any VLAN or network
- Remove interfaces: the network connections are completely disconnected from the VMs
- Assign interfaces: here you can already define which interface is assigned to which network
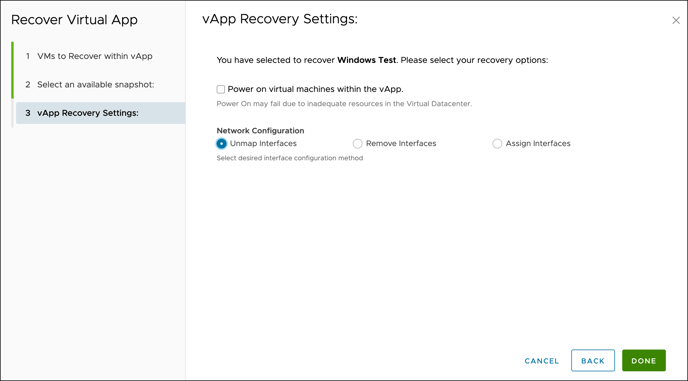
After you confirm, the vApp or the selected VMs are restored.
Recover Files
With this function, you can restore individual files within a VM.
ℹ️ NOTE
This restore method is not recommended if the file you need is on a snapshot that has already been archived or offloaded to Object Storage.
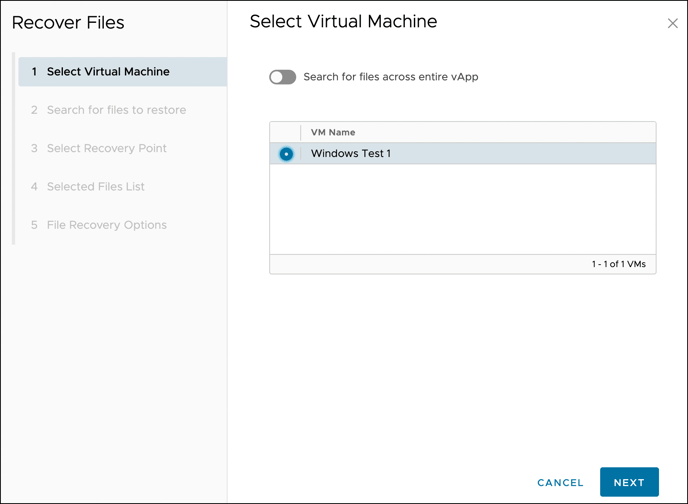
In vCloud Director, go to the Protection -> vApps menu, click the vApp, then click Recover Files. Here you select which VM within the vApp you want to restore files from, or whether you want to search the whole vApp:
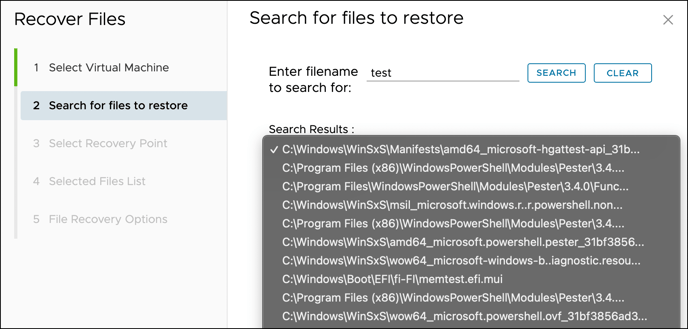
You can then search for the name of the file you want to restore:
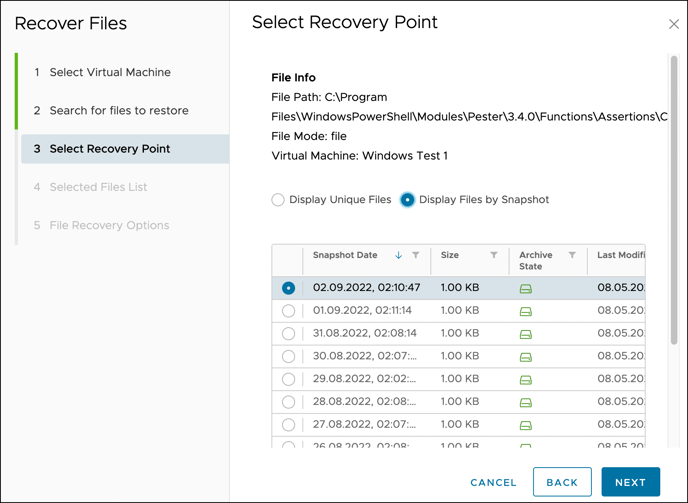
Once you have found and confirmed the file, select which version you want to restore:
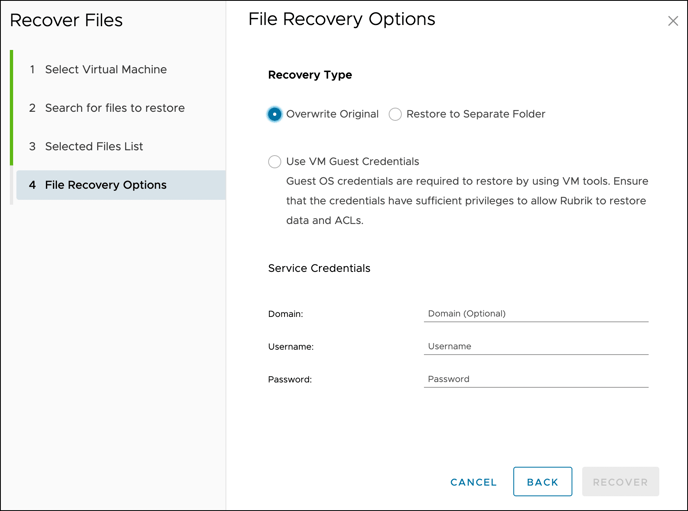
Finally, select whether the file should overwrite the existing file on the VM, or whether it should be restored to a different directory. You also need to enter the OS credentials (administrator password of the VM):
After you confirm, the file is restored.
Export vApp
With this function, you can restore a vApp so that the backup is applied as a new, separate vApp in your VDC. You use this, for example, when you only need to repair parts of the vApp or of a VM and want the restored vApp to run alongside the existing one.
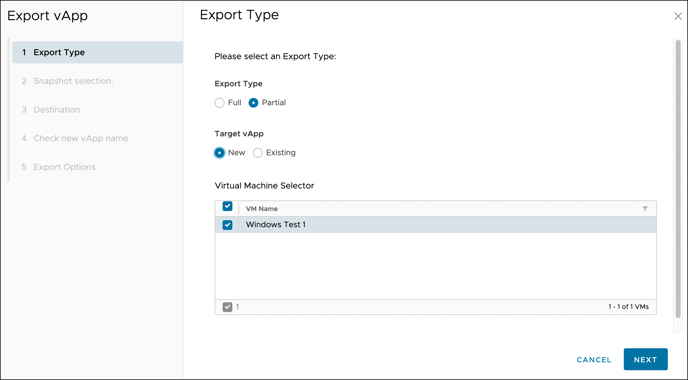
In vCloud Director, go to the Protection -> vApps menu, click the vApp, then click Export vApp. Here you select whether you want to restore the whole vApp or only individual VMs within the vApp. If you restore individual VMs, you also select whether they should be restored to the existing vApp or to a new one:
Next, select the snapshot point in time, just as with the "Recover Files" function (described above).
If you chose to restore to a new vApp, select the VDC to restore to and enter the new vApp name.
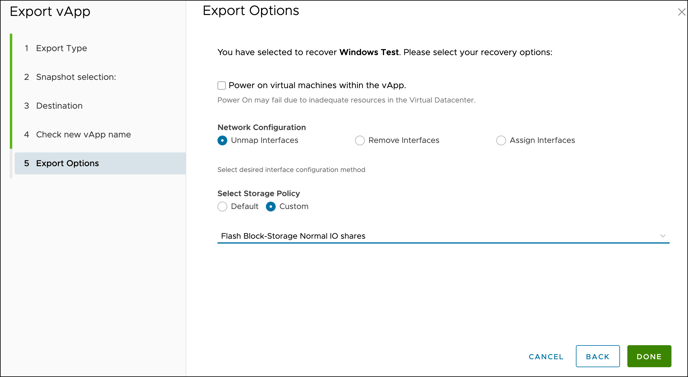
In the last step, select whether the restored VMs should be powered on after the restore or not, and what should happen to the network configuration, just as with the "Recover Files" function (described above). You can also specify the storage policy you want.
After this last step, the vApp is restored as specified.